Friday, June 29, 2012

strawberry rhubarb tartlets


In my last post on my recent obsession with making rhubarb tarts, I had used a new rectangular tart pan which delivered a different aesthetic to my tart, and I loved it.  This led me to order these mini tart pans, which escalated my tart-making obsession to another level!


For the crust, I made an all-butter pie crust, divided the dough into 6 equal portions, and rolled each one into a circle and carefully lined each tartlet pan.  Then I ran my rolling pin over the tops, in order to cut off the excess dough.


For the filling, I decided to add strawberries to my rhubarb, since I love that specific combination of flavors.  So I chopped my rhubarb and strawberries into same sized chunks, and then tossed them with sugar, flour, and a pinch of salt.


Then the tartlets were ready to be filled.  Usually I would arrange a nice pattern with my rhubarb when making regular-sized tarts, but in this case the strawberries were already starting to grow soft from the sugar and the rhubarb was chopped into chunks, and there wasn't really way to arrange them nicely.  So I just divided the filling among the prepared tartlet pans, and used a spatula to push the filling out to the edges.


After they baked for about 50 minutes, they were golden and beautiful!


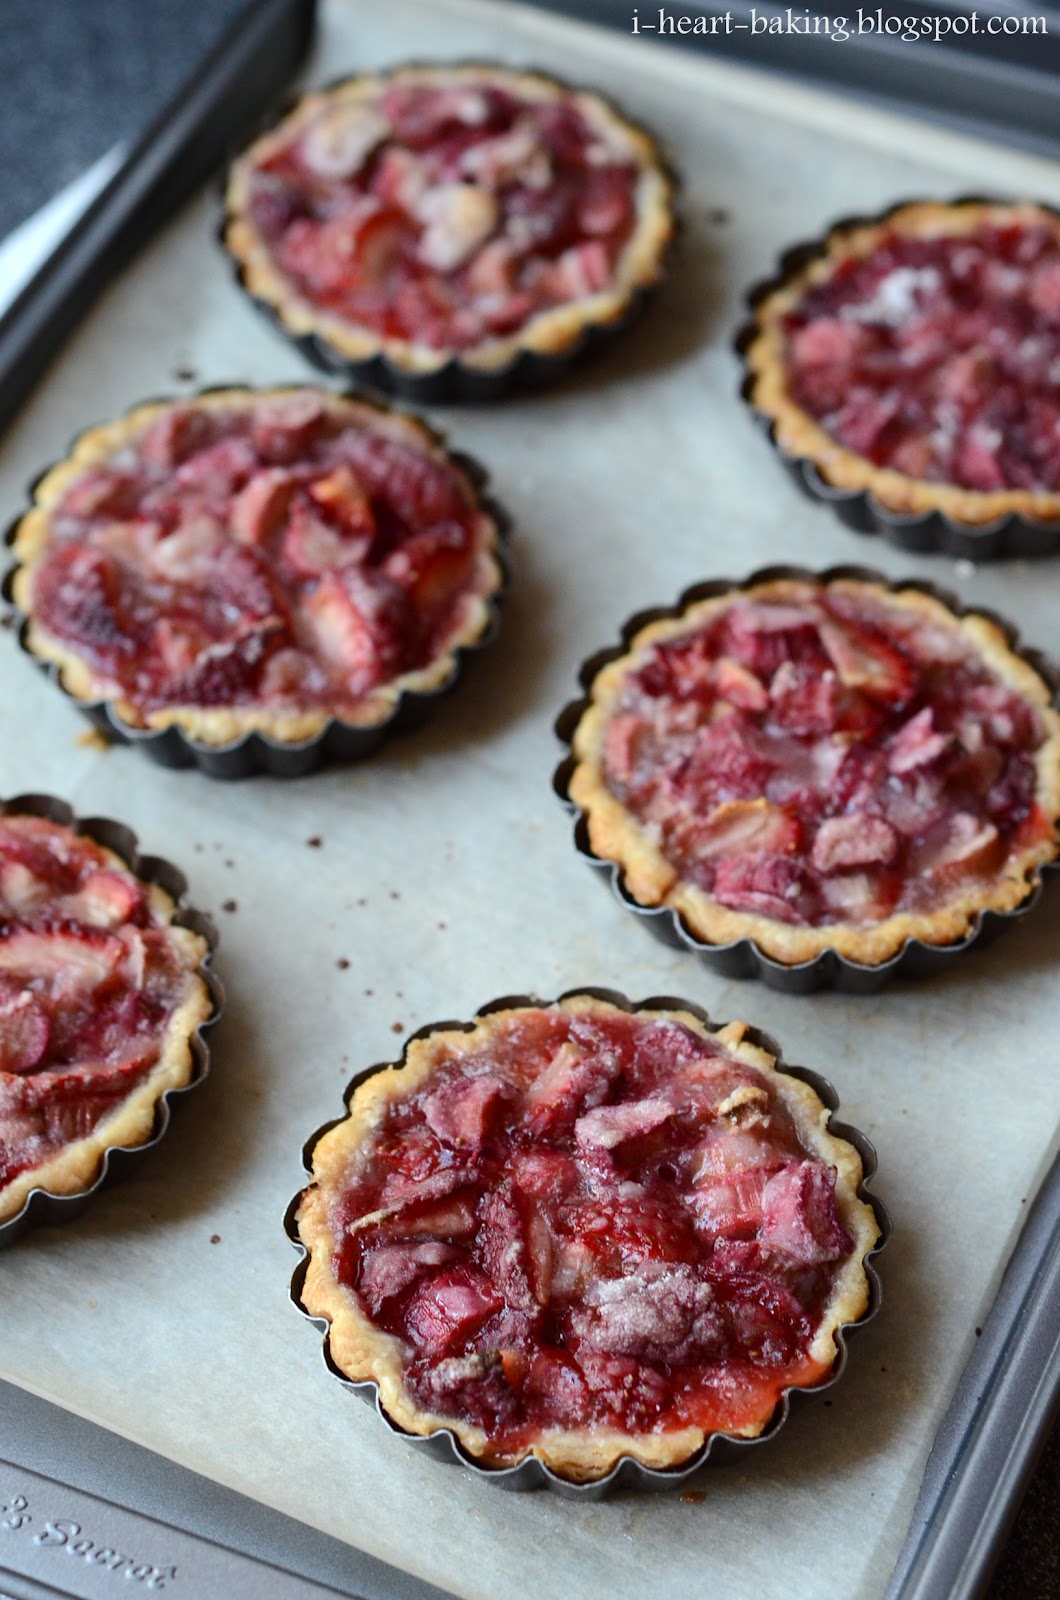
They were best while still warm and fresh out of the oven!  But still good the next day as well.  The strawberries and rhubarb combined were divine, as the strawberries mellowed out the tartness of the rhubarb, and the colors together were just beautiful!


I decided that I like the mini tarts even better than one big tart, a) because the crust is even flakier and crispier - perhaps because it's a smaller amount of filling than in one large tart, and b) because you get a whole tart to yourself!

Sunday, June 24, 2012

rhubarb and honey tart


Last month, I went to the dentist three times.  There was a checkup visit, a second visit to replace two cracked fillings (during which I endured 3 painful shots to numb me which did not work), which led to a third visit to actually replace the fillings (this time I got numb after 4 painful shots, yay!).  As you can see from my Instagram picture, I wore my favorite Hello Kitty shoes to cheer myself up ... I was really nervous!


The day after my fillings were finally replaced, I announced out loud that I was going to make a rhubarb tart, to which my husband promptly reminded me, "Think of all the trips to the dentist you just had!"  But, fueled by my recent revisit to baking with rhubarb, I insisted that I must do it while rhubarb was still in season!  Although, I compromised with him - based on my husband's theory that honey doesn't give you cavities (question for you dentists out there - is this true?), I decided to try making this rhubarb tart with honey instead of sugar.


Usually I make my rhubarb tarts in this round tart pan with removeable bottom, but this time I chose to use my new rectangular tart pan (similar to this one).  So I made my favorite all-butter pie crust, and carefully rolled and lined my tart pan with the dough.


Then I sliced my rhubarb and mixed it with honey (about a half cup), a pinch of salt, and a couple of tablespoons of flour.


Then came the fun part - arranging it in the tart pan!  I've tried arranging it in a vertical pattern as seen here, as well as a horizontal pattern as seen here, but this time since I was using a rectangular tart pan I decided to make two long rows of rhubarb.


Then I brushed the exposed pie crust with egg wash, and sprinkled on a bit of sanding sugar before popping it in the oven.


After about 50 minutes in the oven, it was done!  By this time the whole house smelled delicious.


When I first sliced it, I didn't love the way the rectangular piece looked.  I was starting to think I should have made it in the round tart pan after all.


But then I realized that I could still slice it into triangular pieces.  In love with rectangular tart pan once more.


It's even better with a scoop of ice cream.  For breakfast.


With a cup of coffee to top it all off.  The end.


Monday, June 18, 2012

flowery vanilla green tea ice cream


During a visit a while back, my friend Helen brought over a tin of Mariage Freres "des Impressionistes" flowery vanilla green tea, and now it is one of our favorites!  The tea is light and has a slightly floral flavor to it, with the added warmth of vanilla.  It almost tastes sweet by itself.


Recently we had my friend Diana and her husband and kids over for dinner, and upon serving this tea after dinner, everyone agreed that it would make a fabulous ice cream as well!  So a couple of weeks later when they came to visit again, I set out to turn this delicious tea into an ice cream the night before.


I've used various teas to flavor ice cream before, such as earl grey ice cream and jasmine tea ice cream, so I followed the same concept (based on a combination of Gourmantine's jasmine ice cream recipe and David Lebovitz's green tea ice cream recipe from his book "The Perfect Scoop").


I added the loose leaf tea to hot milk and cream, and let it steep for about an hour.  Then I strained it, and pressed on the steeped leaves to get the maximum flavor out of them.  After discarding the used leaves, I poured the mixture back into the pot and let it warm on the stove.  Then I whisked egg yolks with sugar, tempered the egg yolk mixture with the warm milk/cream mixture, and then poured everything back into the pot.  Once the pot was back on the stove, I cooked it over medium heat, stirring constantly, until the mixture thickened into a custard.

I let the mixture cool to room temperature, and then let it chill the fridge for a few hours before churning it in my ice cream maker.  After it churned for 25-30 minutes it was ready, and I poured the soft ice cream into a container and let it set overnight in the freezer.


The next day, I found fresh rhubarb at the market, so I decided to make a rhubarb tart to go with the ice cream.  The combination of flavors ended up being the perfect marriage of crispy crust, tart rhubarb, and creamy floral ice cream!

I didn't take any pictures of the tart and ice cream with my camera that night, but I did take pictures with my phone, so my Instagram pictures will have to do!


Incidentally, this led to a slight obsession with rhubarb in the coming weeks, which turned into an addiction of making rhubarb tarts!  Stay tuned!

Monday, June 11, 2012

cookies and cream camouflage petal cake


For my husband Grant's birthday last year, I made him this cake covered with rainbow sprinkles, with a hidden chocolate mousse heart inside.  I had wanted it to be happy and rainbow-themed, but I guess it turned out kind of ... girly?  So this year, I wanted to make him a manly cake.  So I made him a camouflage cake!


For the frosting, I had brainstormed and sketched a few ideas on how I would execute the camouflage design.  One idea would just be a simple piping of swirls of camouflage in two shades of green, brown, and black.  The other idea was to use those same colors, but pipe them in sort of a petal effect, similar to the purple ombre petal cake that I made for Mother's Day.  After sketching it out, I thought the petal effect would be super cool!  So I decided to try it.


Grant's favorite ice cream flavor of all time is cookies and cream.  So I decided on a three-layer chocolate and vanilla cake, filled with cookies and cream whipped cream!  I baked two 6-inch layers of chocolate cake using my favorite homemade chocolate cake recipe (I actually baked three and put one in the freezer, tightly wrapped of course), and one 6-inch layer of vanilla cake using the "hot milk cake" recipe from the book "Miette: Recipes from San Francisco's Most Charming Pastry Shop".


For the whipped cream filling, I chopped up some oreo cookies (actually, I used "Joe's Os" cookies from Trader Joe's), and mixed it into freshly whipped cream, flavored with a hint of vanilla.  I wanted a thick layer of the cookies-n-cream filling, so at this point I also made a cream cheese buttercream frosting so that I could pipe a border of it on each cake layer, to keep the filling from squishing out from the weight of the cakes above it.


I wanted the inside of the cake to look like an oreo cookie itself, so the bottom layer was chocolate cake, followed by a layer of vanilla cake, and then a final layer of chocolate cake, all separated by the cookies-n-cream whipped cream filling.  This created quite a tall cake!


With the remainder of the cream cheese buttercream, I divided them into four portions, the amount varying by how much of each color I would be needing: brown, black, green, and light green.  For the black icing, I added dark chocolate cocoa powder, as I try to avoid coloring as much as possible, so I only had to add a tiny bit of black coloring.  For the brown icing I simply added cocoa powder, but for the greens I had to use coloring (although for the light green, I added a bit of cocoa powder to give it more a "dirty" light green effect).

First I did a quick crumb coat with the chocolate frosting, and after letting that set in the fridge for a bit I was ready to start camouflaging!


Using the method described in this tutorial from The Hungry Housewife, I piped my petals one vertical row at a time, creating patches of different colors to create the camouflage effect.


Then I piped the top of the cake using the same technique (although in my opinion, it came out kind of squished, and resembled M&Ms on the top of the cake).


And then I was done!  One very tall camouflage cake.  (I won't call it a "petal cake", to keep with the "manly" theme of the cake!)


I hope you enjoyed your cake, my love!  Happy Birthday!


Tuesday, June 5, 2012

mint thinmint ice cream


This year I bought around 12 boxes of Girl Scout cookies, from various family and friends.  Most of them were samoas and thinmints, as those are my favorites, and even though I was able to devour a few boxes by myself, there were still plenty left over.  That's when I decided I would make ice cream with them.


My friend Diana's husband and their daughter love mint chip ice cream, so when one weekend we decided to get together and play, I made them mint thinmint ice cream.  I turned to my copy of David Lebovitz's "The Perfect Scoop" for a mint ice cream recipe, although at the time, I didn't have any fresh mint on hand, so I used peppermint extract instead (plus a few drops of green coloring).

After churning the ice cream for about 25 minutes, I added a cup of chopped thinmint cookies.  Then I let it it churn for a few minutes after, to incorporate the cookie bits, and then poured the soft ice cream into a container and let it sit in the freezer overnight.


The next day we all met for lunch, and after a big meal of delicious burgers and fries, we had our ice cream!  Perfect and refreshing for a big burger meal!


A week later I made another batch of the same ice cream, this time using fresh mint from our garden (turns out we had mint after all!)  This time I heated milk and cream on the stove, and then soaked the fresh mint in it for about an hour (after the heat was turned off).


When I went back to check on it, the milk and cream mixture had turned a beautiful shade of green!  Then the rest of the steps were the same with the churning and the addition of chopped thinmint cookies at the end.


When I tasted the fresh mint version, it tasted really fresh and clean.  But it wasn't the same "mint" flavor as you'd expect from mint ice cream.  This was more of a "mojito" mint flavor, minus the lime.  But it was still good.  Next time I'll look for fresh peppermint leaves, and try it with that instead!